| This site was founded by the late John Skakel. Contact us HERE
Cemeteries Office Staff have asked that users NOT contact them with questions directly. Actual Preservation Techniques
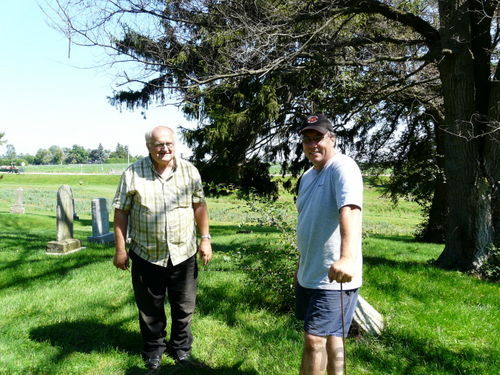
Volunteers Les Mancell and Tom Millard
discuss the best way to bring a stone
that they are working on back to life
Photo by T Nigh |
Saving Standing Monuments for Future generations
Finding stones that have been lost.
There are a number of ways to find lost stones. Most DON'T work! First off the tried and true method of prodding approximately every 1/3 meter on the square is a good start. However, remember that to be effective, you must prod both straight down and on a 45 degree angle. You will not catch tiny head and foot stones prodding the ground straight down except by sheer luck. Prodding on the angle will catch many of those. But it is harder to keep straight prodding on the angle, so it is best to prod straight down as well. Tile prods are expensive and do not work well for this. For information see our "Tools" area. It is far better to have you own made. It will work better and be less expensive. Note - Avoid hitting a stone too hard with a prod if you can avoid it. You can scratch stones with them.
Using old records you can sometimes find information on location of stones 10 or 50 years ago. But remember, what was visible or standing then may not be such today.
Once you find a stone you can often use a screwdriver or other such tools to find it's edges. You do not need an expensive prod to do that.
Electronic location devices. We have done some work and have some experience with these. So far they have not proven to be reliable to find stones right under the surface. However, they will find stones located further down that you would likely miss otherwise. And do not give up on that idea of using them to find surface stones. You can find graves that are even 150 years old with them. So, for instance if you know stones are missing in a certain area, you can find the graves there, and use that information to try to locate stones at the head of those graves with a prod. A scanner can still be a highly valuable helper if you can get access to one.
Bringing lost stones to the surface.
Here it is simply learn to do by doing. However, some hints.
- If you find a stone that is in pieces, take out the parts one at a time and put them aside in their proper order and direction as you removed them with the top up. You will find that even simple breaks can be a real jig saw puzzle to put back together when you do not have a "Roadmap" to do it.
- Be extremely careful lifting the stone out to not break or mark it with a shovel or heavy bar. Some of these can be very heavy. Do not get yourself into dangerous situations. Wait for help!
- If the stone is in reasonable shape decide before you begin if you are going to stand it up or lay it down. Try to figure which way the printing should go. Figure exactly where the stone should stand. How will you fill in the old hole? Decide these before proceeding.
- Locate the old base and decide if you are going to bring it to the surface.
Perserving a stone that cannot be raised.
Creating a gravel border and bed.
Lastly always do a VERY thorough job of removing every little bit of gravel and soil on the top of the stone itself. This gravel will really anchor itself there over time and we do not want that. Such causes scratches and stains and all kinds of such things. Also, always be certain to NEVER use gravel with even a tiny bit of soil mixed into it. This simply makes a place for a bit of moisture to stay and a friendly spot for roots to propagate. You want to be very sure to keep all gravel absolutely 100% free of even the tiniest bit of soil and/or sod.
When working with small stones, and the badly broken flat upright stones of marble, sandstone, slate, etc, you will often find that they are just too badly broken to stand them up. Each stone you work with of ANY type should probably be surrounded by stone dust or small gravel. You want to use about the least expensive gravel that you can get as you are going to use a whole lot of it! Having gravel around a stone and renewing this gravel base by working it up every two or three years will keep the lawn mowers away from stones and thus prevent such damage. You will occasionally find stones that are "Full of cracks". If you find one of these it should we think lay flat to try to prevent further damage. Also, if a stone monument has a hollowed out area on it that will catch water, that stone should be placed on a gravel bed at an angle.
We have been gradually developing a new method to deal with these monuments. The method is similar, but instead of doing them as we initially did, we now leave them quite significantly above ground level with a deep bed of gravel underneath them. The problem with the old method was that weeks could come in quickly even in the gravel and the stone was too quickly engulfed by vegetation, and people were walking on them. This new method serves several purposes. It means that the top area of gravel can dry out completely in dry summer months, thus killing grass and weeds before they develop. It tends to prevent people from walking on the monument and scratching them. And it allows you to keep one end high in the case of stones with areas that might have caught water using other methods.
You want to simply remove the stone itself, keeping track of the individual pieces by reassembling all in a spot a few feet away from your work site. Then clean out the area where the stone sat plus removing a bit of vegetation on each side of that, making sure all loose soil is removed totally. NEVER back fill with any sod for any reason under a monument. ALWAYS use gravel! Then, begin to fill with stone dust gravel. Keep putting wheel barrow load after load in to the spot, building it up a bit at a time and packing it. Remember that you need to be 15 cm wider than the stone itself on all sides of it at the top of the stone. You want to make a bed of gravel about 20 cm (8 inches) deep MINIMUM for the stone to sit on. Make sure that the top is absolutely FLAT! Then begin to set the pieces back in order, but leave about 3 cm (1 inch) between the pieces as you place them back in. This will probably mean that some parts are slightly wider but don't worry about that. When all pieces are in place, bring the gravel up even with the top of the stone, and fill all of the spaces between the stone pieces with gravel. Pack all as best you can. Again, if your monument has a place to catch water we recommend you put it on a bit of an angle. Lastly make certain that you have a border of at least 15 cm (or 8 inches) on ALL sides of the stone. We prefer even slightly wider. Please be prepared as this takes a LOT of gravel to do just one stone monument. But we have had MUCH better luck with it than we had with other ways.
'''Note... If you have two stones that are fairly close consider putting solid gravel between them taking out all soil and sod in there. That way a mower does not have to get into that area to cut grass thus avoiding damage to stones and frustration on their part with your work.
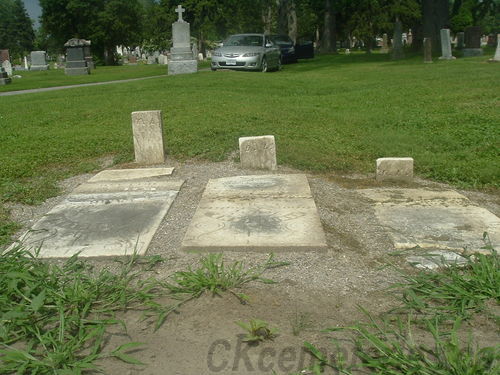
This photograph shows the way
WE USED TO DO THESE MONUMENTS!
Stones sitting in a gravel bed. |
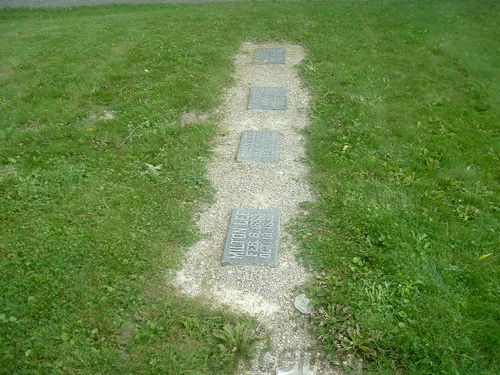
Note gravel around stones and
grass removed between stones
Photo by John Skakel |
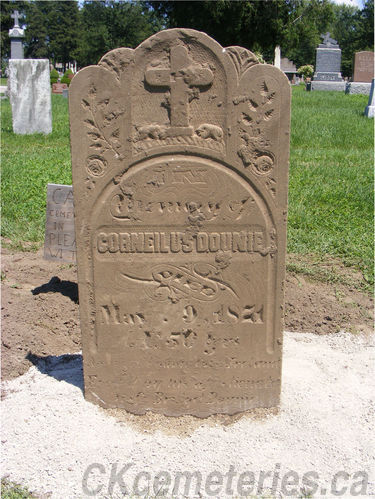
Raising Stones. Deciding which stones can stand again.
You can often stand stones up again. Some may be even able to stand in their old bases. Others, maybe even most, will need to stand in the ground on their own. It is extremely important that in all cases that the stone stands on a bed of gravel.
- Assess the stone. If you can stand it up and keep the important text such as name, birth date, death date, etc., then you should consider standing it up. If you have to cover "Poetry" at the bottom, the consider doing it. The stone will last longer standing. You need to be able to have roughly one quarter to one third of the stone AT LEAST under ground level to allow it to stay standing safely. If you can do that proceed as follows.
- Check for a base. If one exists we suggest you bring it to the surface. You may want to repair it and use it again later. You may want to just use it to protect the back of the stone, etc. Once on top, level the base with gravel under it, etc. Remember to plan carefully so you can keep the text on the stone showing in the correct direction later.
- Then, dig a hole down right against it for the stone to sit in. It MUST be deep enough to have about 12 cm of gravel in it for the stone to sit on or it will sink quickly. Make sure you do not have any loose soil in the hole. Place gravel base in hole and level and pack it.
- When you get the hole dug for the stone to stand it up, try to bring it in, in such a way that you do not get loose soil into the "Pit". You can allow the back of the stone to touch the old base, or fill the area between stone and base with gravel. Back fill totally with gravel packing it well with your feet as you go. NEVER use soil to backfill. You can use soil you dug out to fill the area where the stone once lay, but you must use gravel otherwise.
- In the case of broken stones you might be able to stand one portion up, and leave the other portion in a bed of gravel in front. We take every chance that we can to stand stones up again! Lessening frost and water damage. etc.
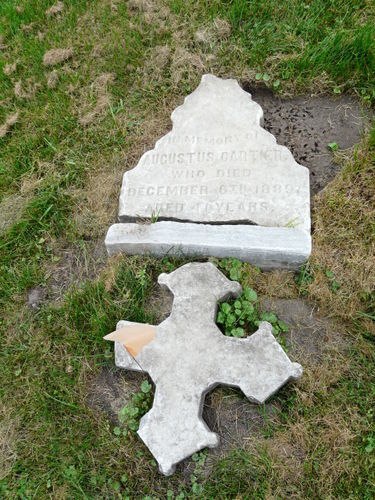 Stone awaiting decision on whether Stone awaiting decision on whether
A peg(s) or Epoxy can allow it to stand again
Photo by T Nigh |
Repairing Standing Monuments and Tops of Spires
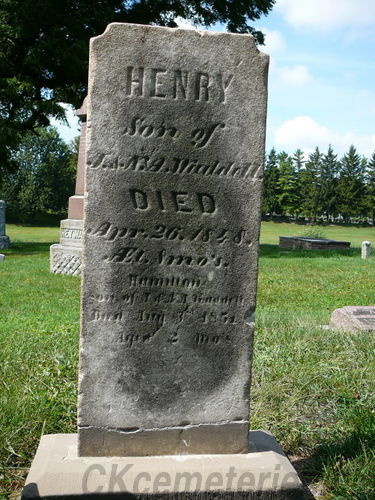 Stone going through Stone going through
the pegging process
Now standing again
Cracks will be less visible
when finished
Photo by T Nigh |
Repairing (Pegging) broken slab stones, Angels, etc.
I am certainly not qualified to give information on this subject. I am not sure if anyone can write something like this down. You really need to take a course for a half day or more in order to at least get an idea on how this is done. Let us just say that by placing stainless steel threaded rod inside some stones in strategic locations with epoxy, and thus attaching them together, following with a limestone mortar it is possible to repair stones with very severe breaks. In other cases it might be possible to simply use an epoxy. This does however involve some knowledge that is hard to get by reading. It is very much a learn to do by doing technique.
I do think that there are a couple of things that we might bring out though.
- First off, that a company named Daubois produces a limestone mortar that simply requires adding water to it. Our biggest problem with doing this is the time involved to do it. With hundreds of stones to repair, it just takes so long to mix all compounds of that mortar. However, if we can use one that simply involves adding mortar that helps greatly!
- Secondly, comes the fact that Epoxy and totally premix compounds (like putty) will not allow water to permeate them. This water can then come out the edges of the stone, evaporating, and leaving deposits of salts and compounds that can destroy the stone. The premix compounds that are putty like are great when used with modern granite stones. But they do not work on things like marble or sandstone.
- Every book I could read describing mixing these compounds with water always mentioned making the mixture very dry. Just about as dry as you can make it and still be workable. I could never figure why. Finally we found the reason. If the mixture is more "Wet", you will get finger marks, and mortar marks all over the stone, and they will not be removable. You will not see them when you finish the stone. But once things dry you will.
- One of our contacts mentioned he uses a product that is made by Lithomix , and it's a mix that hardens and can be carved with chisels to any shape. This is used to repair and replace large and small parts of sculptured stones that have a piece broken off.
For more information on epoxy types please check our Epoxies Explanations Area. |
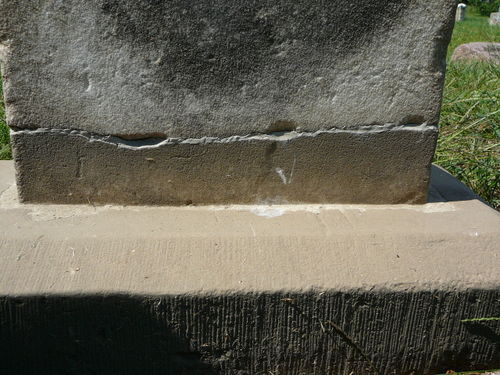
Closeup of stone above
Cracks will be less visible
when finished
Photo by T Nigh |
|
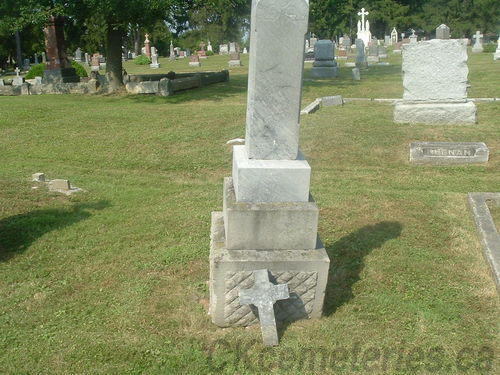
Note the cross broken from the top
of this spire stone.
Photo by John Skakel |
|
Repairing/Pegging/Reattaching the decorations to the top of spires and other stones
Most any cemetery you walk through, if you reach up to the decorations on the top of the spire stones and other such stones, you can simply slide them off the top. Some need to be lifted off. However, these are extreme safety hazards as it only takes one kid to put his hand up top and that stone could slide off and hit a brother or sister. Take a look at the top part of the stone. Is there a hole in it? If so you are away. Similarly there should be a hole in the bottom position. Using Epoxy and stainless steel threaded rod, insert a rod into the hole and epoxy it in. It should be long enough to allow the other piece to sit on top. Now then there are two theories on this. The first is to simply set the top over the rod. The second is to epoxy it in position. Doing it the first way allows repairs more easily the next time something gives away and rusts out, etc. Doing it the second way might be more safe preventing it from being knocked off. You can then seal the edges off with limestone mortar, or if the stone is granite use the premix putty. If you epoxy the top on you can actually use a grease such as butter on the shaft to prevent the epoxy from holding onto it, allowing it to be unscrewed off later. |
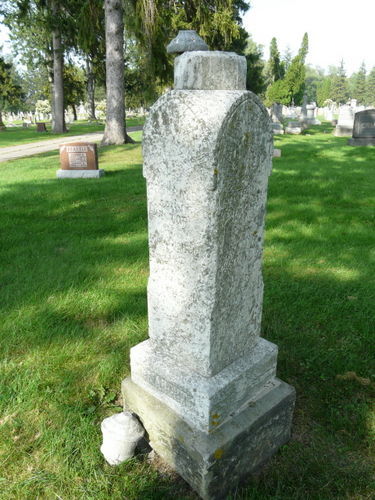
Spire Stone with loose top. |
|
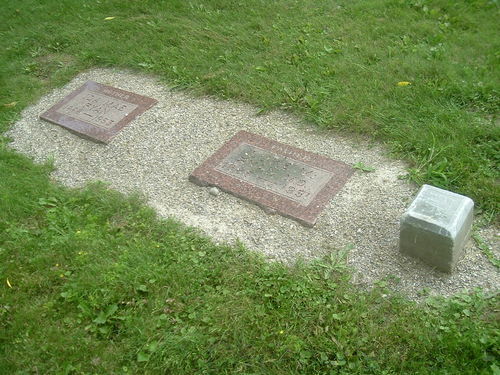
note the small square plot boundry marker
Photo by John Skakel
|
|
Raising these stones and things to watch for.
These stones are so common today yet even today they are already being banned in some cemeteries. The problem is that these simply disappear so very quickly under the sod. We suggest that if they are below ground level that you consider raising them. Now then the problem comes in that there is no size rule with these. Some of them are only maybe 15 cm thick. You can easily place a shovel beneath. Work them out. Place gravel under and around them. And put them back. However, others can be as much as a meter and a half "thick" from top to bottom. In these cases you might even need some type of mechanical lifting device to pull them up. (engine lift?) If you are working alone in particular we would suggest that you do a bit of prodding to see how thick the stone is before you begin to work on it.
If you have a number of these in your plot, you might consider taking all soil out between that and making that into a bed of gravel so the mowers do not have to cut in there. That will make the stone's chances of survival with no breakage even better.
Just always remember that as always each of these should be sitting on a bed of gravel beneath them, and have a backfill of gravel all around them to keep mowers back from them and allow proper drainage, etc. |
Note the wide rim of gravel around
the stones for drainage and the gravel
between the stones to take care of
weeds. Photo by John Skakel |
|
Small Foot Stones and other Markers
We have found small foot stones to be a problem. Similarly corner stones. What do you do with them? Pretty much up to the people on your cemetery board.
However, the following are some suggestions.
- Corner stones. We suggest either bringing them up quite high, or leaving them quite low, as they are trip hazards. Safety must always be a major concern. In either case, consider using a very sizable border of gravel around them and a good cushion of packed gravel underneath.
- Small foot stones and other markers. Foot stones and other markers are always a problem. What best to do with them. In the beginning we tended to leave them where they were with the thought that no stones should ever be moved. However, we began to realize the problems this cases for grass cutters, and future maintenance of the preserved areas.
- Lately we have been moving many of these stones up near the head stone with the printing facing out. With today's technology we can do scans to find burial locations or use the old "witching" techniques. The old vs the new. However, the foot stone is now historical but not needed to mark the exact grave for future grave diggers. Thus we have found it is often very helpful to simply stand it up right near the stone it is associated with and in front of it with print facing out.
- The third option is to place it into a bed of gravel level with the ground with gravel on all sides.
Any of the above three options are great when considering what to do with foot stones. It is really a decision of your board. But please remember the historic value of these stones. They should NOT be removed in any case!
- Other items like the square bottoms of cement bases, old cement rough slabs, etc all present problems. Often times they tend to confirm burial places, and are a part of history. Yet often times they are in the way of mowers etc. This is simply something that you need to decide upon.
NOTE ..... Always remember that using soil to hold a stone in place rather than gravel is totally useless. It will be totally tipped again in only a few months if you hold it up with soil or do not put a bead of gravel beneath it. |
Stones sitting in a gravel bed.
Notice the position of the foot stones.
Photo by John Skakel |
|
|