| This site was founded by the late John Skakel. Contact us HERE
Cemeteries Office Staff have asked that users NOT contact them with questions directly. Fixing up your Family Plot
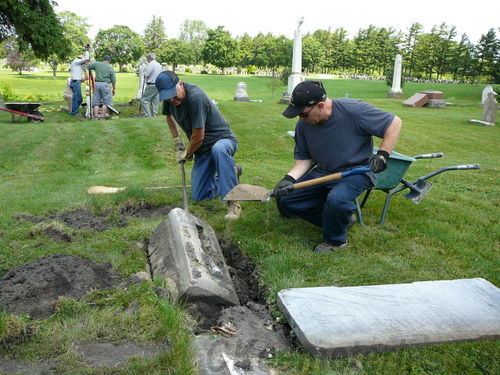 Volunteers working with a
base stone
Photo by T Nigh Volunteers working with a
base stone
Photo by T Nigh |
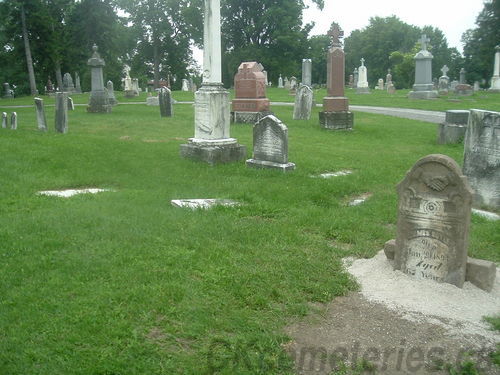
Photo by Skakel |
We as volunteers often have people ask us how to fix up a family plot. How to stand stones up again. How to keep marker stones visible. How to straighten large stones. If they cannot do these things for health reasons, is there
some way to get it done?
In fact, you can ask volunteers to help you with your plot, but you must contact the cemeteries office to make arrangements for this. If volunteers do work for you we would appreciate you letting cemetery folks know you appreciate it, and possibly making a SMALL donation to allow us to buy gravel and epoxy etc for future restoration projects.
Things Not to do in your own plot, and plots of others.
- Never do any work in plots that you do not own! Volunteers are trained to know what plots to work on and what to do there. But unless you become a volunteer, you must NEVER work on plots owned by others.
- Never use soil (dirt, sod, etc) to level or raise stones. ALWAYS use gravel. What we use is called Stone Dust. You can bring your own or use some from the cemetery if there is a pile there when you need it. Raised stones for instance might fall again within a year if you use even a thin layer of soil under them instead of gravel!
- Never move stones around in the plots "because they look better lined up"! Many plot owners would NOT take kindly to that.
- Never move stones in your family plot. Yes, you are allowed to do it as an immediate relative. That stone is marking a grave burial. Please leave stones or markers where you find them, this gives the cemetery staff an easier route to locate graves when they are doing searches for families.
- Never attempt to straighten a spire stone or other large stone. Volunteers can help you with smaller ones of these. Or for larger ones you MUST get help from professionals. Indeed, you are responsible to keep stones in your family plot in a safe condition.
-
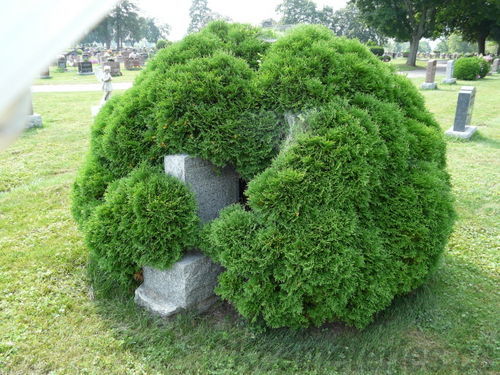
The bush totally covers
the beautiful stone inside
making text totally
unreadable
|
If you find loose parts on a family stone that might present a safety hazard you are required to have those fixed. The cemetery staff can tell you who to contact to do that.
- NEVER plant trees or shrubs in your family plot. They can cover and in fact gradually destroy one or more stones in your plots and neighbouring plots from roots growing.
- Never use a power washer on stones or a wire brush. Use of such opens the surface of the stones and exposes them to quicker deterioration and more growth of fungus' etc. Experts suggest a whisk broom or soft brush, But never a brush with colored bristles .
Tools you may need
The tools you may need very greatly with the job to be done. But keep in mind that the main aim is to NEVER touch the stone with a metal tool. We suggest a straight mouth spade (like you might edge a side walk with) for course digging. For finer work you can purchase small plastic garden tools at places like Home Hardware or Canadian Tire. You might like a pails to get water to wash off stones, and a small whisk broom to brush off heavier dirt. A pencil and paper are often handy to write down text, etc. A small tarp is also handy to put the soil and sod on as you dig so as not to kill the grass. A long old screw driver works great to prod for lost stones, and an old sharp knife can be handy to cut through sods.
You will probably also need some pails to carry gravel or even a wheelbarrow. And for some jobs a level can help.
Raising Corner Stones
It is very simple to raise corner stones.
- When raising a stone we use fine crushed gravel screenings to level and bring the stone to the surface. Always pack the Gravel in layers around the stone, Otherwise the stones will not stay stable and will shift and tip. So Packing Gravel is the way to go.
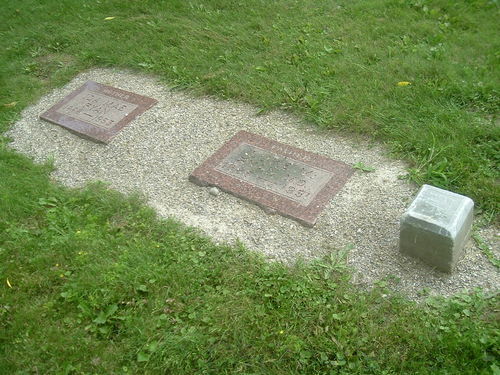
Note the ground level granite stones
and small square plot corner
marker. Photo by John Skakel |
- If the stone is no longer visible simply use a screw driver or something similar to find it.
- Dig about 10 cm away from them on each side down about 1 small shovel depth. Remove the sod. Lift the stone out. Some are quite long. Hopefully you will NOT have dug to the bottom of the stone.
- Place enough gravel in the bottom of the hole to raise the stone up to about 6 cm above the ground level.
- With the stone now the right height simply put gravel around it up to the soil surface.
- You can usually work from that stone to find the other corner stones and thus raise them as well.
Head and Foot Stones
Pretty much exactly as above. Just a couple of words of warning though. Many plots have square ground level granite stones with the person's name and possibly death date. Sometimes these are actually made to go into the ground very deep and are thus extremely heavy. We recommend that you do a bit of probing to see how deep those stones go before attempting to move them.
Head and foot stones. You might find a small rectangular foot stone with initials at the end of the grave(s). Most of these were removed in days gone by when mowers and good record keeping became more common. These can be placed in gravel in their original location. In the case of a Head Stone, dig around it. lift it out as above, and place a small bed of gravel under it and gravel around it as above.
Broken, or Tipped flat monuments.
ALWAYS before you do any digging write down ALL text on the monument.
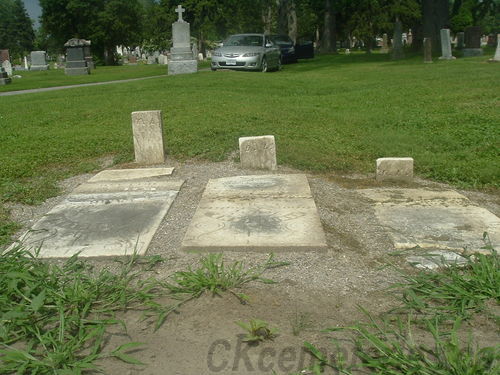
Stones sitting in a gravel bed.
Notice the standing foot stones |
If you have a flat stone laying on the ground in your plot you might want to ask a volunteer for help.
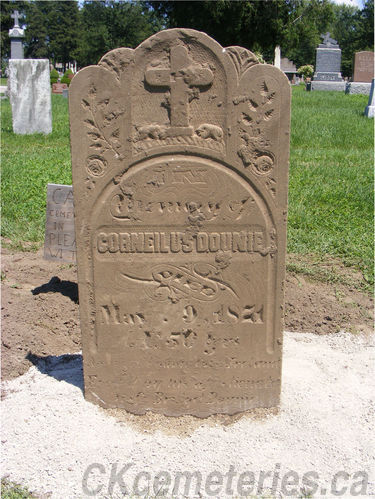
When working with older stones you may find a large base buried in the ground. If you do we recommend you ask a volunteer for information on how to deal with it. This base can be used to help keep the stone in position, but there are techniques to do that are not easy to describe here. However, as a general guide.
- If the stone is in one piece and/or can be stood up again to leave about 1/3 of it in gravel to anchor the stone while still leaving the name and death date visible (not the poetry below) we recommend that you stand the stone up again.
- Dig a hole in the ground slightly deeper than needed for length of stone. Again, try to bury it with maybe 1/3 of it in gravel in order to anchor it.
- Put about 10 cm of gravel into the bottom to DELAY (not stop) the stone from sinking.
- Pack the gravel bed. Place the stone in the hole.
- Hold it straight and backfill the hole with gravel to level with the soil around it or preferably slightly higher. You should have about 20 cm of gravel all around it in order to anchor it and to keep mowers away. Be very careful NOT to allow any soil to mix with the gravel near the top in order to restrict weed and grass growth.
- Check for straight. Pack carefully.
If the stone is going to be placed flat on the ground
If the stone is in pieces we recommend you lay it down flat into a bed of gravel. In fact if the stone is in more than three pieces you might consider asking a volunteer for help as these can be very difficult and take a great deal of patience to preserve.
- We recommend that you first have a look at one or two done by our volunteers recently.
- Carefully dig around the stone and remove it from the bed of sod it is lying in. Be absolutely certain to NEVER touch it with a shovel or any other metal object. Such tools can scratch stones and leave non repairable damage.
- Inspect to find a base that might mark the original location of the stone. NEVER lie the stone over top of an old base as this can cause it to break.
- Dig a bed where the stone will sit that is about 20 cm wider than the stone on all sides. Dig that bed down to about 5 cm deeper than needed to place the stone even with ground level. Remove all loose soil. Place a bed of gravel into the hole and pack it so the stone will be just ABOVE ground level or even with it. It should NEVER be below ground level.
- Place the stone in the bed. If the stone is broken, leave about 2 to 3 cm of gravel between the pieces unless it is broken into more than three or four pieces.
- Backfill as necessary around the edges with gravel and pack well.
Never lay a flat stone over top of an old buried base! This can cause serious damage and breakage.
Modern monuments that are tipped and/or sinking
Never attempt to straighten or raise a large modern above ground granite stone yourself. These are generally on cement bases and are extremely dangerous if moved in any way. To repair them you will need to contact a monument company or similar. Remember that you are responsible if someone gets hurt with a monument of a relative.
However, you can raise or straighten the smaller head stones etc as described above.
Caution
Never attempt to straighten ANY stone with bars (levers) etc that is more than 2/3 meter in height unless you are trained to do that. If a stone tips it can cause serious injury or even almost certain death!
 |
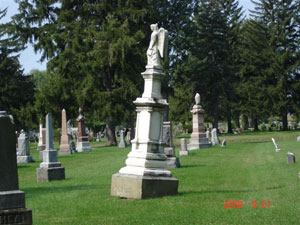
The Goodyear Angel in a
tipped position
Photo by Bruce Warwick |
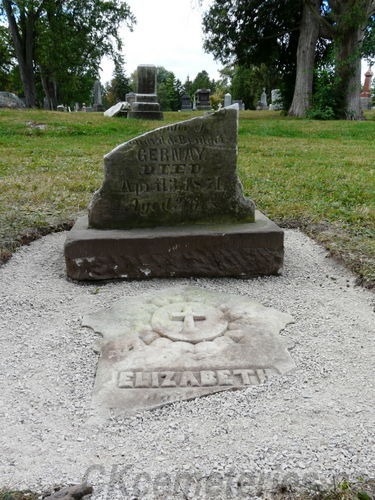
Note combination of
methods to
preserve stone
Photo by T Nigh |
|